Getting Started: From Scratch to Launch
14. Work Tabs And Menus

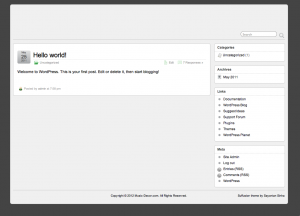
As you can see from this screenshot –>, the web site isn’t much to write home about at this point.
A Word of Caution…
Don’t go shouting from the rooftops for all to hear that “there’s a new web site out there, and please visit ASAP, and tell all your friends, and here’s a t-shirt…!” Not yet! Save all of that for your official “launch.” Remember, you would never invite folks to your new restaurant before your kitchen was ready to serve, or before there was a place for patrons to dine, visit and enjoy themselves. So too, you don’t want folks to drop by your web site before it has something for them to keep their interest.
So now, I’ll walk you through the customization of the Suffusion theme for my new web site, www.Music-Decor.com. You can work on each step with me on your own new web site, if you wish.
Open A New Tab
I always work with two tabs for each web site when I am editing or adding content. One is set to wp-admin for that site on whichever page or post I am editing or writing, or on selections from the “Dashboard.” The other work tab is set to the main domain so that I can refresh it to see how each change will look to the rest of the world. So I’ve set the “work” tab to “www.Music-Decor.com/wp-admin/” and the other tab to “www.Music-Decor.com”.
Put Some Pages And Categories in Navigation Menus
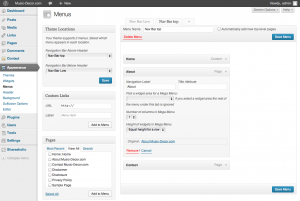
 I like to start with the “About” and “Contact” pages in a menu above the title or “header” area called the “Top Navigation Bar.” To do this, find the “Appearance” tab in the left Dashboard menu and select “Menus.” In the “Theme Locations” box, under “Navigation Bar Above Header”, select “Nav Bar top”. Under “Navigation Bar Below Header”, select “Nav Bar Low”, then click the “Save” button.
Next, in the large box to the right, there are three tabs at the top: “Nav Bar Low”, “Nav Bar top”, and “+”. Click the “Nav Bar Low” tab, let the page load, then find the “Categories” box on left below the “Custom Links” and “Pages” boxes. Unless “Uncategorized” is already listed in the large “Nav Bar Low” box on the right, select “Uncategorized”, click the “Add to Menu” button, let it load into the large box on right and click the “Save Menu” button.
Then, click the “Nav Bar top” tab in the large box to the right, let the page load, then find the “Pages” box on left below the “Custom Links” box. Select “About” and click “Add to Menu”. Then do the same thing for the “Contact” page.
You can change what label to use for each of these pages in the menu under Navigation Label, especially to shorten them if your page titles are longer. For example, I changed my “About Music-Decor” to just “About” under Navigation Label because I still want the full title to display when on that page, but I want a short label to appear in the menu.
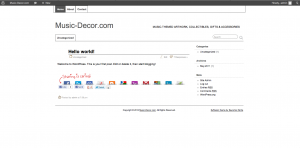
 You can drag and drop each of these to re-order them in the menus, if you wish, then click the “Save Menu” button. Go to your main domain work tab to refresh the page so you can see how this has changed your site’s appearance. Click the image to the right for a larger view to see how mine looks, so far.
Next, Select “Skinning” From Suffusion Top Menu
Next, I’ve set my “work” tab to “Suffusion Options” under the “Appearance” tab in left Dashboard Menu, and the other browser tab is set to www.Music-Decor.com. Since we’re loading this theme from scratch, we are able to skip the “Upgrades” and the “Export/Import” options on the “Suffusion Options” welcome screen. Select “skinning” from the top menu and we’ll get to some big appearance changes.
Now, Go To ‘Suffusion Theme Customization’ →
I have dedicated a separate step-by-step guide to the Suffusion Theme Customization. Click the above link to follow along with how I set up this free WordPress theme.
Then Go To Step 15: →
← Back To Table of Contents
